
Nutritional information per loaf
Calories: 1383kcal | Carbohydrates: 290g | Protein: 39g | Fat: 3.7g | Saturated Fat: 0.3g | Fiber: 10g | Sugar: 1g | Calcium: 67mg | Iron: 18mg
How To Make Sourdough Bread | My Basic Sourdough Recipe
Sourdough bread uses a natural sourdough starter levain formed of cultivated wild yeasts and organic acids. In recent years eating sourdough bread has become extremely popular as its health benefits, digestive qualities and all-absorbing flavour have driven its resurgence, and it’s pretty simple to make!


Nutritional information per loaf
Calories: 1383kcal | Carbohydrates: 290g | Protein: 39g | Fat: 3.7g | Saturated Fat: 0.3g | Fiber: 10g | Sugar: 1g | Calcium: 67mg | Iron: 18mg

Ingredients for 1 Servings:
Ingredients to make sourdough bread
- 330g White bread flour
- 190g Water
- 100g Sourdough starter
- 30g Water
- 8g Salt
- A handful of rice flour (if you can find it) and some extra flour for dusting
At the end of mixing, your dough temperature should be 24C (75F). To achieve this, if the temperature of your room is 22C, adjust your water temperature to be between 10-12C (50-54F). If it’s cooler or warmer, adjust the water temperature a little. For a full explanation and formula, see my guide on how to achieve the perfect desired dough temperature.
Total Recipe Time
Goes Great with


Making, eating and baking sourdough is not just better for us. It’s also very enjoyable. By following the steps in this beginner’s sourdough recipe you’ll learn how to make sourdough bread you can be proud of and begin your journey as a sourdough baker!
What you need to make sourdough bread
Most importantly, you need an active sourdough starter. You can buy one here or make a starter yourself. It’s very rewarding to make your own! Follow my sourdough starter recipe if you don’t have one already. For best results, it should have undergone regular feeds for at least three weeks and be peaking in around 6 hours. You can see my guide on how to tell if my starter is ripe.
Before preparing your dough you need to decide how you will bake your bread. You’ve probably worked out that you will need an oven (I hope so!). You can either use a Dutch oven to bake your sourdough or you can bake it in the oven directly with a preheated baking stone or inverted baking sheet. Baking in a Dutch oven is a great beginner-friendly way, but you have more control to make different shapes and types of bread when baking directly on a baking stone.
Aside from your oven setup, you don’t need much specialist equipment. A couple of mixing bowls, scales, a banneton and a baker’s lame or serrated knife is all you need. I have a full guide on bread baking equipment if you want to check out my favourite tools to help you.
Step-By-Step Method For This Recipe
1) Weigh the ingredients
Zero a mixing bowl on a scale and weigh 190 grams of water. Again, zero the scale and then spoon in 100 grams of your sourdough starter.

Weigh the 330 grams of flour in another bowl then add the flour to the wet ingredients. Use a circular or figure of 8 movements with a dough scraper or your hands to combine. 2 – 3 minutes later the mixture will be fairly even.
2) Start the autolyse
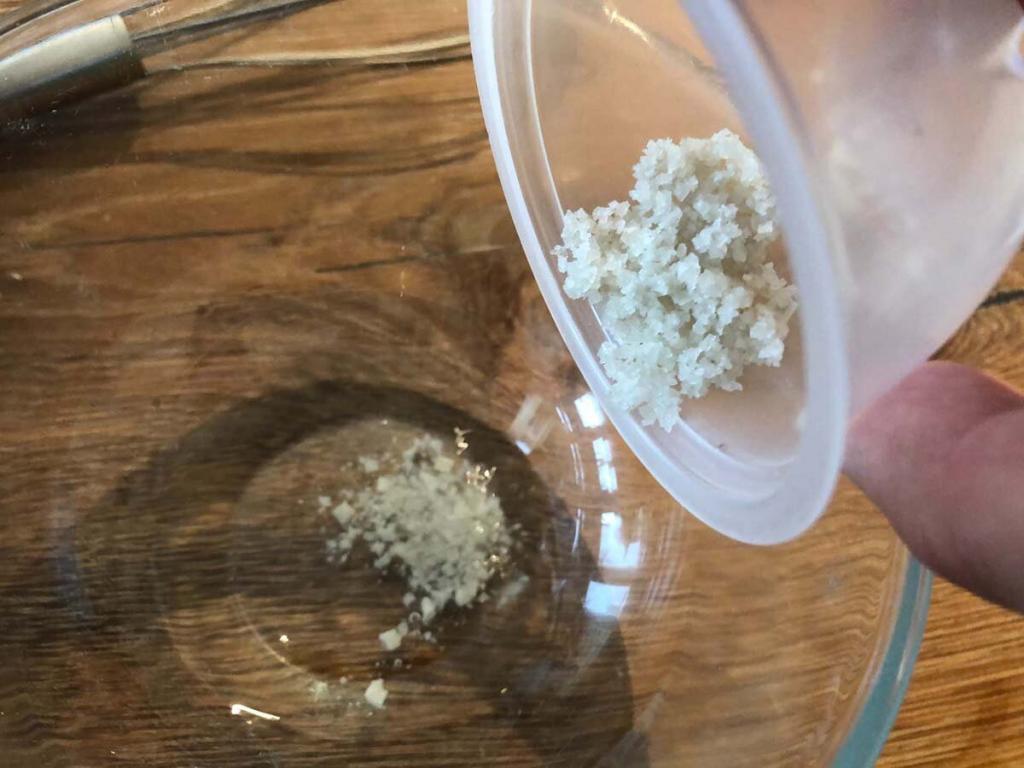
Begin autoylsing by covering the bowl with a bag or lid and set aside. Whilst the autolyse is taking place, take a small bowl and weigh a further 30 grams of water. Weigh 8 grams of salt and whisk it in the water until dissolved.

3) Mix the dough
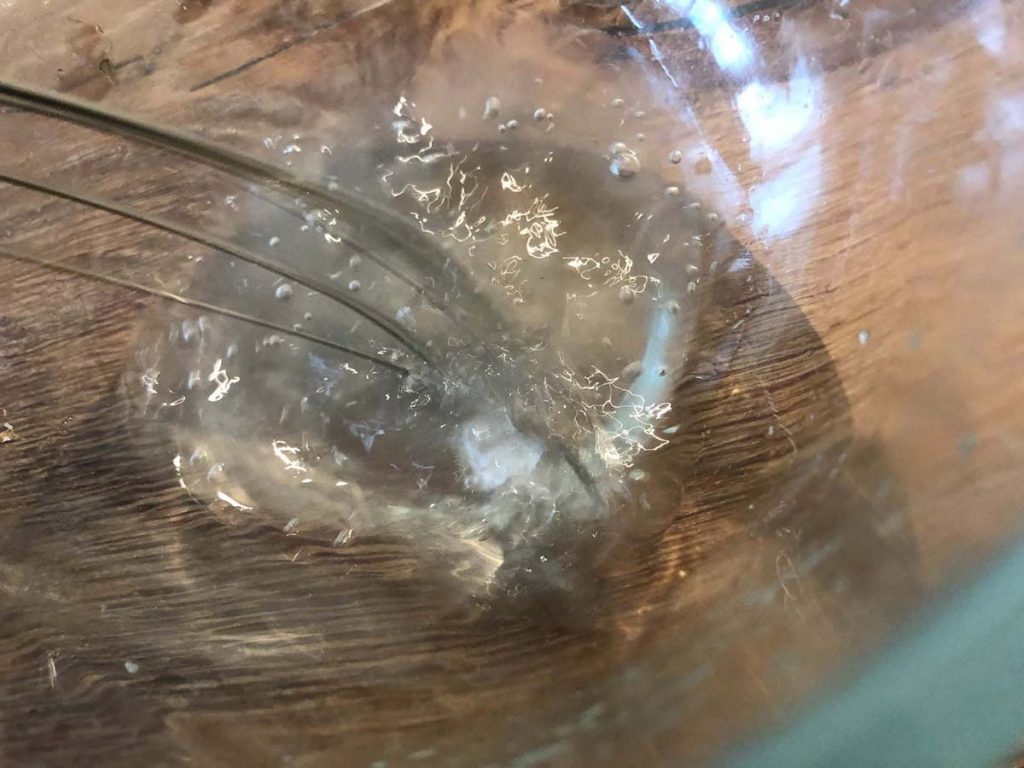
After 30 minutes the autolyse can end. Take off the cover and add the salted water. Fold the dough over itself to push the salt-water solution into the mixture.


Once the water absorbs and the dough starts to cling together, switch techniques. Stretch the dough with any gentle kneading method you like.
The kneading should last 6 minutes or 4 in a stand mixer (use a low speed!). Once finished, the dough should not feel wet or sticky. It will be strong, slightly silky and you’ll see some lovely long strands of gluten when it’s stretched.
4) Bulk fermentation
Return the dough to the bowl or container and cover. Leave to rest on the worktop for 1 hour.
5) Stretch and fold
Next, we’ll stretch and fold the dough to redistribute the ingredients. If a stretch and fold looks a bit challenging, you can simply knead the dough for 10 seconds instead. Afterwards, pop the dough back in the bowl, cover and leave to rest for another hour.
6) Repeat the stretch and fold
Do another stretch and fold and leave covered for its final hour.
7) Test if it’s ready
After the third hour of bulk fermentation, the dough should be ready to shape and begin its final rise. It should be fairly gassy by now, but not overly. It’ll have nice long luscious gluten that stretches out to pass the windowpane test.
The temperature of the room is important. I’m doing this recipe at 22C, if it’s warmer you should reduce the time and if cooler a little longer will be needed. It will take a bit of practice to understand what sourdough bread feels like at each stage.
To fix, stretch and fold again and rest for another hour. Consider fermenting it in a warmer environment. Placing my dough in the oven with only the light on provides just enough warmth to increase the rate of yeast activation.
8) Pre-shape
Once you are happy that the bulk fermentation development is sufficient, the next step is to shape it into a ball.
Once it’s shaped, leave to rest on a lightly floured area of your worktop for 20 minutes. Covering it with a tea towel or upside-down bowl will prevent it from drying out.
9) Prepare the proofing basket
Banneton proofing baskets are readily available these days, you can see the banneton I recommend here. If you don’t have one you can use a large bowl lined with a tea towel.
Dust a layer of flour and rice flour (if you have it) on the inside of the proofing basket. Too much is better than too little, you don’t want the dough to stick!
If it’s a new basket, wet it with a water mister first so the flour has something to cling onto.
10) Final shape
Shaping a round bread
For a round-shaped banneton, reshape using the same boule technique used previously.
Shaping a long bread
If you are using a long shaped basket, the technique is slightly different.
Place the dough into the proofing basket with the smooth side downwards and the rough side (the seam) facing up.


Dust a bit of extra flour around the edges of the basket if you are worried about the dough sticking.
11) Final proof
Using a large upside-down bowl or a loose-fitting plastic bag cover the banneton without touching the dough and leave it to rise.

The final proof will take around 2 – 3 hours at room temperature. Alternatively, place the covered proofing basket into the fridge overnight.
12) Preheat the oven
Preheat the oven to 250C (480F) ready for the bread. It takes around an hour for baking stones to heat thoroughly. If you are using a cast-iron Dutch oven it can go into warm at the same time. If your Dutch oven is ceramic, check the manufacturer’s guidelines as many can’t go in the oven empty. If this is the case, you’ll put your risen dough into it cold which means it will take an extra 5-10 minutes to bake.
If you don’t have either, preheat the thickest baking sheet you have upside down on the oven shelf. If baking without a Dutch oven, add an extra tray with a deep lip below the stone/inverted baking sheet as well. We’ll use this later to add hot water to create steam.
13) Testing if it’s proofed
To tell if the dough is ready to bake we inspect it. The rounded base will have flattened and it’ll have risen to almost double its original size.
You can also use the poke test by pressing the dough with a wet finger and measuring how quick it takes to ping back. It should stay down for 2-3 seconds. Allow more time if it springs straight back up.

If you are using the overnight fridge schedule, the poke test won’t work. If the dough’s nearly doubled like in the picture, you’re good to go.
14) Tip the bread
Depending on whether you are using a dutch oven or not, a different method is used to remove the dough from the proofing basket.
With a Dutch oven
Cut a piece of baking paper that’s the same size as the base of the Dutch oven. Then either tip the dough onto the paper and lower into the preheated skillet. Or, place the paper in the Dutch oven and drop the dough straight in.
Without a Dutch oven
Boil a cup of water, you’ll need to add this to the oven to make steam. Next, lightly flour a baker’s peel. A flat board, chopping board or tray will work well if you don’t have one.

Top Tip: Turn the proofing basket upside down so the dough falls onto the paper or peel. Give the basket a tap if you need to release the dough
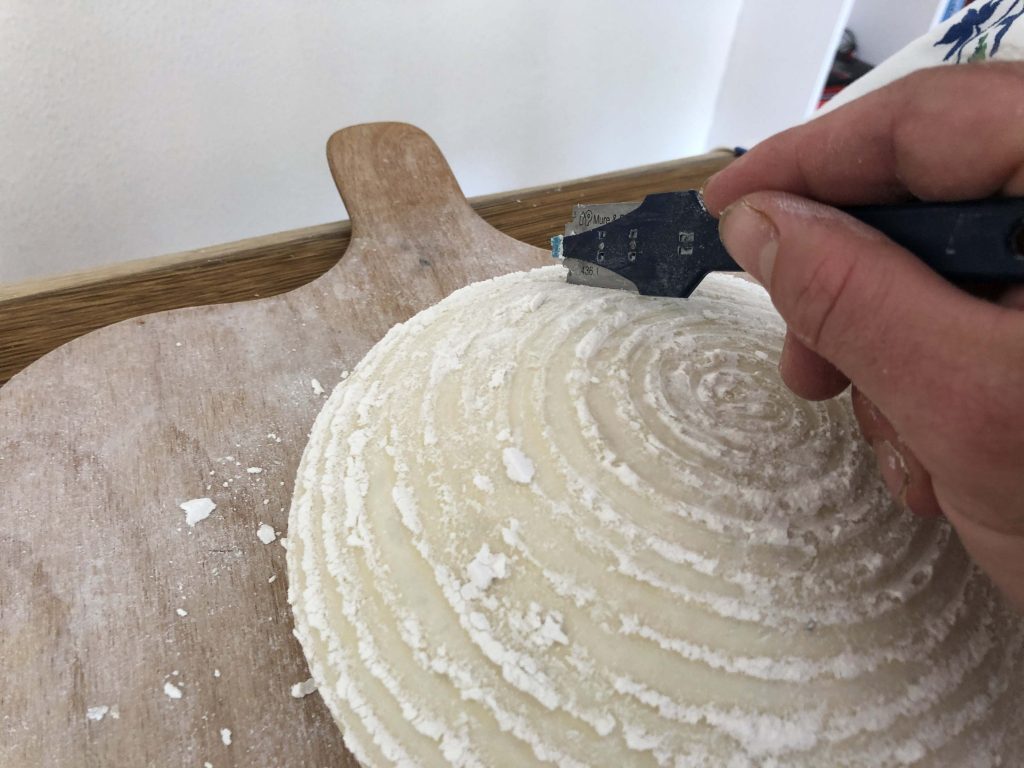
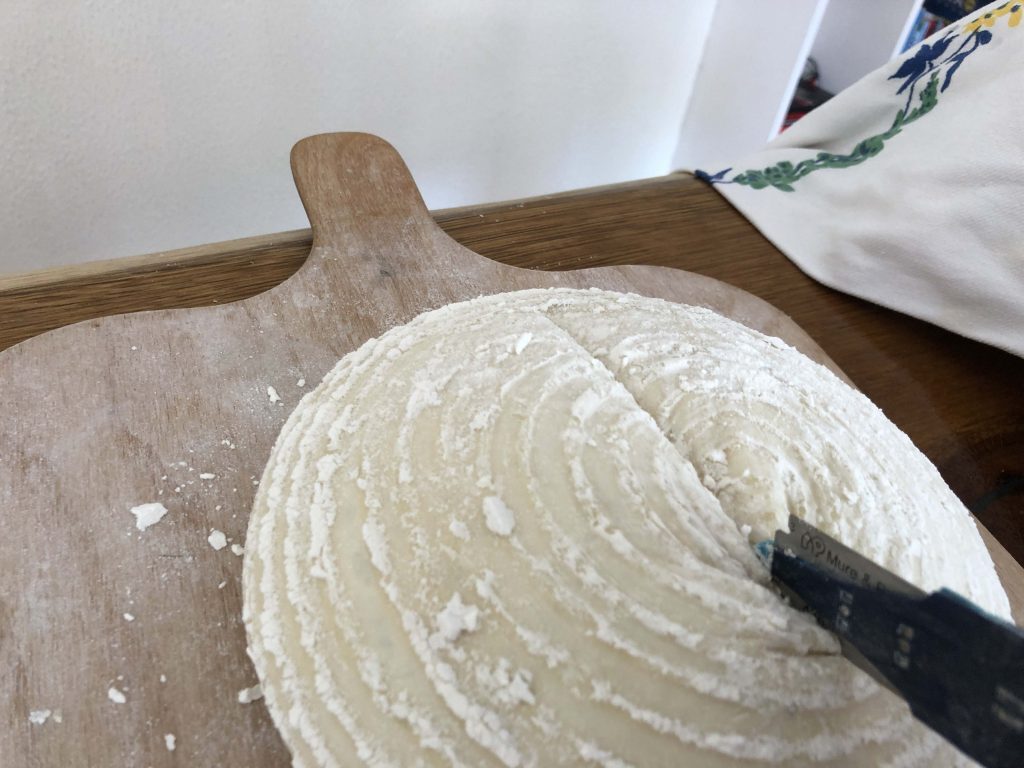
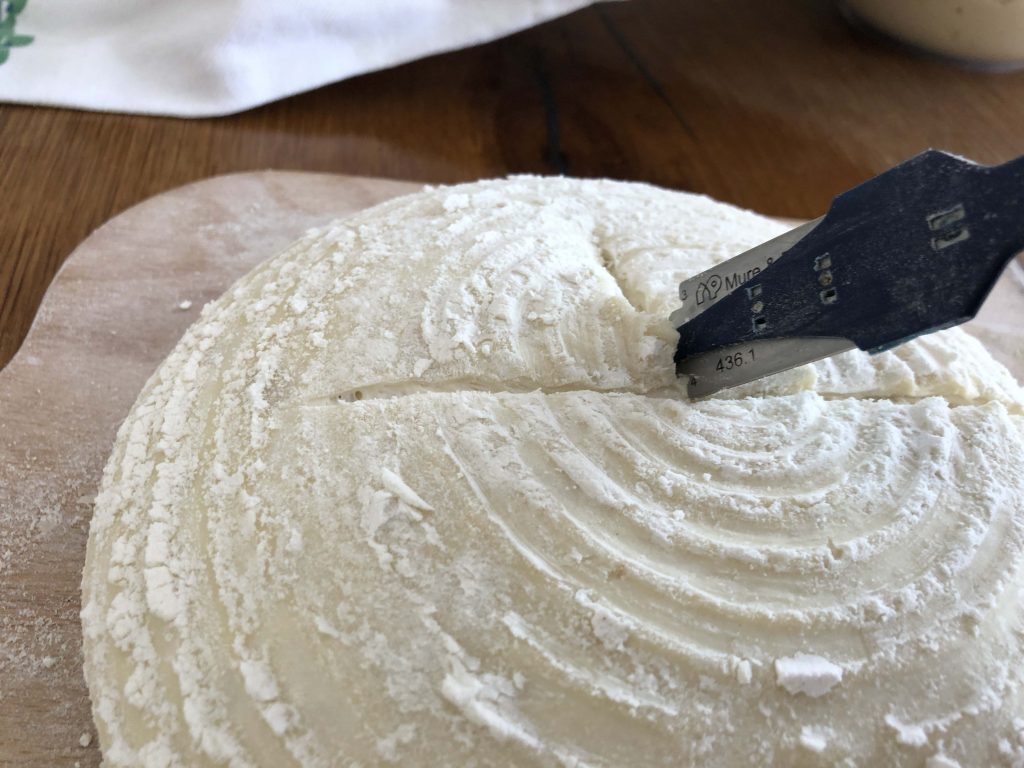
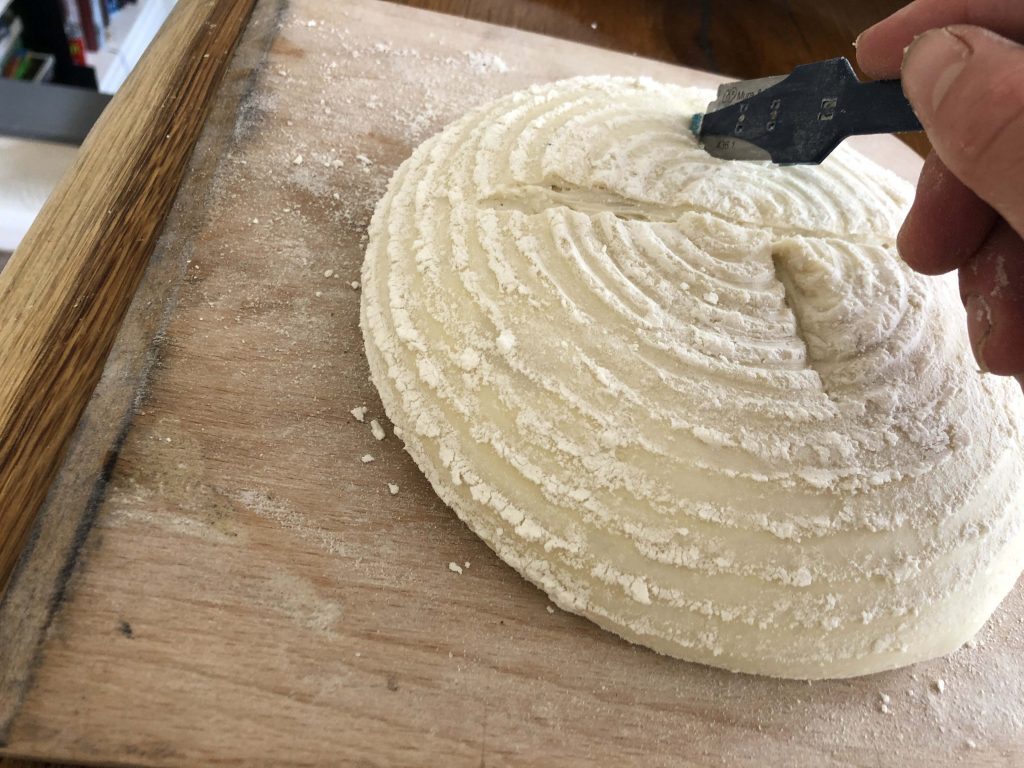
15) Score the bread
Using a lame or serrated knife, slice one long cut towards you, and turn the bread 90 degrees to cut halfway before turning 180 degrees to cut the other side.
16) To bake in a Dutch oven:
Pop the Dutch oven straight in the oven, turning down the heat to 230C (450F). It will take 40-50 minutes depending on the power of your oven. After 20 minutes, open the oven door and remove the lid. Continue to bake at 210C (410F) until the crust is golden.
17) To bake on a baking stone or tray:


- Slide the dough onto the baking stone and then add a cup of boiling water to the lower baking tray. This will kick start the oven spring.
- Move your hands out of the way and quickly shut the door.
- Drop the temperature to 230C (450F).
- After 20 – 25 minutes, open the door to release the steam and consider dropping the temperature down to 210C (410F) if the crust is well coloured.
- Bake for a total of 35 – 45 minutes until golden.
18) Remove from the oven and cool
Take out the oven using gloves or a peel and turn it out onto a cooling rack. To check the bread is fully baked, test by tapping the bottom and if it sounds hollow.

19) Leave to cool & that’s it!
Cooling allows moisture to escape and the crust to harden. It is best to leave the bread to cool for a couple of hours before cutting. Ideally, cool your bread on a cooling rack to maximise airflow. It should be left until it reaches blood temperature before slicing, but I know it’s hard to resist sometimes!
That’s all you need to know to make your first sourdough bread. When you are ready to take your skills to the next level, visit the sourdough homepage. There are plenty of articles to help you master your sourdough skills.

Extra Tips For This Recipe:
How to tell when bulk fermentation has ended
I could write a full article on the bulk fermentation and proofing stages of sourdough, and I have! It’s a full guide to help new sourdough bakers understand what occurs during both stages and how to master and tell when they should end. You can view it here: Sourdough proofing guide
What to do if your sourdough doesn’t rise
The most common issue sourdough bakers run into is when their dough doesn’t rise. The reasons for this are explained in the why isn’t my bread rising post and will be closely related to using a new starter that wasn’t quite ripe, or proofing in a cold room. To resolve an immature starter, feed it regularly for a few more days and try again. If the room is too cool, get yourself a Brod & Taylor home-proofing box, or try one of these DIY proofing solutions.
How to change the baking schedule to fit your routine
You can adjust the routine of this beginner’s sourdough bread recipe to make it fit around daily life by using the refrigerator to chill the dough. At fridge temperatures, the levains activity slows right down so this recipe can be made over a couple of days. Simply prepare the dough in the evening and leave to bulk ferment for two hours at room temperature, and then put it in the fridge overnight. The dough can then be shaped and undergo its final rise in the morning. Alternatively, proof your dough halfway in the evening and place it in the fridge overnight to finish its rise, it can be baked from cold in the morning, or risen further before baking if required. See my guide on changing the baking schedule and improving sourdough.
Resource: Learn about the science of sourdough
The science behind sourdough is really complicated and there are a lot of bakers sharing wrong information. Though it’s not essential that you understand everything about what’s happening when you make sourdough, my sourdough fermentation process article will help you to make better bread.
Adjusting the recipe:
You can adapt this recipe to suit your tastes or experiment with other flavours. Here are a few ideas that work, more can be found on the adjusting your sourdough recipe page:
Use whole wheat flour
For a heartier version of this bread, trade 100 grams of white flour with whole wheat and increase the first water addition by 10 grams.
Add olive oil
For a softer loaf that keeps a little longer, add 20 grams of extra virgin olive oil to the dough after the autolyse.
Double the recipe
This recipe is for 1 loaf of sourdough bread. If you want to make double for a bigger loaf or divide it into several you shouldn’t have a problem. You can just double the recipe, or use the baker’s formula for different weights.
How to make sourdough bread conclusion
We’ve covered all of the basics in this sourdough beginner’s recipe so you can get started. Let me know how you get on in the comments below. If your first attempts don’t go great, just remember to keep practising and enjoy the experience. Whether you decide to follow this recipe or another, I recommend that you keep using the same one until you are happy with your results. If it’s too wet, use less water next time, and if you think your dough is too dry, add more. If you have any issues with this recipe, read my sourdough bread troubleshooting guide or drop a comment in the section below.
Frequently asked questions about this recipe
I forgot to feed my sourdough, can I revive it?
No worries! If it’s just a day or two that’s missed, just feed it as normal. Keep feeding it and wait until it smells nice and aromatic again. If it’s been a while and there is still no activity, boost your starter with a large feed and keep it warm.
How to get the sourdough twangy flavour?
You can add some rye or whole wheat flour for more aromatics. If there is still not enough twang; practice refreshing your starter when it is at its peak, increase the temperature of fermentation and make the starter wetter when feeding. This increases the activity of the lactic bacteria which provides more of a twang to the bread
How to tell if sourdough bread is baked?
In the oven, sourdough bread should reach 93C (200F) and bake for another 5 minutes. You can find this by using a temperature probe. A good way to tell without a probe is by tapping the bottom of the bread. It should sound hollow.
Can I add yeast to a sourdough recipe?
Sourdough purists will not approve of adding baker’s yeast to sourdough bread, but you can! Adding 1 gram of yeast to this recipe increases its success rate and shortens its rising time.
Can you bake sourdough in a cold oven?
Baking with a cold Dutch oven is a growing trend for home bread bakers, especially with energy prices being a worldwide issue, and you will be surprised just how well it works! To follow this method, place your risen dough in a Dutch oven and then the cold oven. Add a spritz of water to your Dutch oven and turn on the oven. It will take an extra 10-15 minutes to bake.


