
Desired Dough Temperature – How To Calculate And Reach It

Temperature plays a leading role in making great bread. Not only does dough temperature alter how quickly bread dough rises, but it also impacts the bread’s flavour, shape and texture.
In this article, we will cover how to control dough temperature when kneading bread dough. For this, we will take a deep dive into the understanding of Desired Dough Temperature (DDT) and its close partner, the Final Dough Temperature (FDT).
What is Desired Dough Temperature (DDT)?
Desired Dough Temperature is the target temperature of your dough after kneading.
Temperature readings of the flour and room are taken and entered into a formula to provide the optimum temperature for the water. The water is cooled or raised before the ingredients are weighed and kneaded.
As kneading is completed, a final temperature reading of the dough is taken. This is the Final Dough Temperature.
The Final Dough Temperature reading reveals how the formula worked and allows you to adjust the proofing stages that follow and any following doughs.
Desired Dough Temperature vs Final Dough Temperature – what’s the difference?
Desired Dough Temperature is sometimes called Final Dough Temperature and vice versa.
To be accurate, Desired Dough Temperature (DDT) is the dough temperature you want to achieve, whilst Final Dough Temperature (FDT) is the actual temperature reached.
What is the ideal Desired Dough Temperature?
The standard Desired Dough Temperature for artisan bread is 24-26C (75-79F). For intensely-mixed dough used in no-time or quick bread, 28-32C (82-86F) is preferred.
Mixing dough at warmer temperatures does lead to more oxygen being absorbed, which can lead to flour bleaching, a bad thing for bread quality and flavour.
To avoid flour bleaching, artisan bakeries keep dough below 28C (82F) when kneading.
If using the recipe from my how to make bread course, DDT should be 24-26C (75-79F).
How to achieve perfect dough temperature
A common target dough temperature (DDT) is 24C (75F), so let me show you how to reach it (I will talk about selecting the best final dough temperature later on in this article).
All you need is a temperature probe like this one from GDealer (a low-cost probe I recommend) or an infrared thermometer.
1) Take temperature readings of the flour and room
First, record the temperature of the room you are preparing your dough in.

Next, take a temperature reading of the flour before adding it to the mixing bowl.
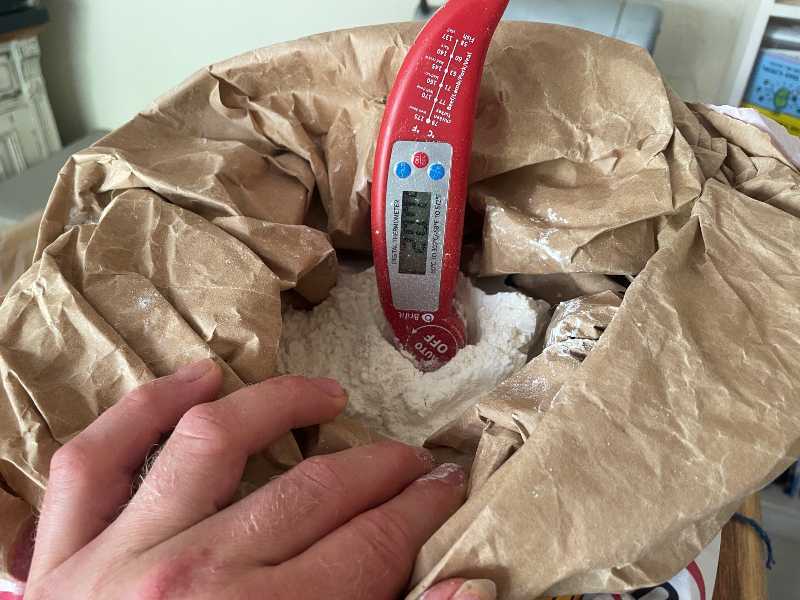
So, I have a Room Temperature (RT) of 22.5C, a Flour Temperature (FT) of 21C and the Desired Dough Temperature (DDT) is 24C.
2) Use a desired dough temperature formula
With this information, you can use the formula below to calculate the ideal Water Temperature (WT):
3 x DDT – RT – FT – 18 = WT
WT = Ideal Water Temperature DDT = Desired Dough Temperature RT = Room Temperature FT = Flour Temperature
- See the formula in Fahrenheit here.
DDT x 3 = 72 RT = 22.5 FT = 21 72 - 22.5 - 21 - 18 = 10.5C
The Water Temperature in this example should be 10.5C
3) Adjust the water temperature
Fill a jug with (roughly) half the water you’ll need for your recipe. Take a temperature reading of the water, and using the hot or cold tap, adjust the temperature of the water to match your ideal water temperature.
Once the water temperature is achieved, begin kneading your dough as normal.
TIP: If it’s warm, store a bottle of water in the refrigerator the night before so you have extra cold water for your bread making. Using ice cubes to cool water quickly is also a popular solution.

4) Check the final dough temperature
After kneading, take a temperature reading of the dough. This is your Final Dough Temperature (FDT). Is it correct?

There is often a bit of leeway when you start using this process, but hopefully, it’ll be within 2C of your target temperature. To learn how you can achieve more accurate dough temperatures, continue reading!
Why is my dough temperature different to the target?
If your final dough temperature is different to the one you expected (DDT), chances are it’s due to how the dough is kneaded.
Friction is created as the dough is kneaded, increasing the dough’s temperature.
The Friction Factor
You might have wondered why we deducted 18 in the Celsius formula (or 30 Fahrenheit)?
This number is a variable called the Friction Factor (FF). It typically ranges between 12- 24 when using Celsius (or 20 – 40 Fahrenheit).
The friction factor value increases when kneading for longer or more intense kneading is committed. When following a no-knead recipe, it’s as low as zero.
When kneading by hand, heat is transferred from the hands into the dough, which warms the dough further, increasing the value of the friction factor.
What is a normal friction factor?
Every dough mixer or hand kneading technique adds a different amount of heat to a dough. Ideally, you’ll learn the friction factor of your chosen method.
Use a base friction factor (tables below) to calculate your water temperature. Then, take a temperature reading after kneading and compare it to the temperature you expected.
To find what your friction factor value should be, rearrange the formula:
FF = (3 x DDT) – RT – FT – WT
When kneading for a different duration, the friction factor should be increased or lowered accordingly.
Typical friction factor values when using a dough mixer:
| Mixing intensity: | Light | Standard | Intense/long |
| Celsius formula | 6 | 12 | 18 |
| Fahrenheit Formula | 10 | 20 | 30 |
NOTE: Some recipes instruct to “Mix until dough temperature reaches a certain temperature”. This method relies on the careful calculations. As mixing warms the dough, once the desired temperature is reached the dough will be correctly kneaded.
Typical friction factor values when hand kneading:
| Mixing intensity: | Light | Standard | Intense/long |
| Celsius formula | 12 | 18 | 24 |
| Fahrenheit Formula | 20 | 30 | 40 |
TIP: For the really geeky amongst us, you may wish to draw up your own table similar to mine with your own findings.

The 240-factor method
The 240-factor is commonly used where readings are taken in Fahrenheit, and a final dough temperature of 80F (27C) is desired. It uses the same method but always uses a DDT of 80 degrees!
(3 x 80 = 240) – RT – FT – FF = WT
So, the 240 factor looks like this:
240 – RT – FT – FF – WT
How to get the perfect FDT when using sourdough or preferment?
If you use a sourdough starter or preferment to make your bread, we can improve the formula to calculate water temperature accurately.
PT = Preferment/Sourdough starter Temperature
WT = (4 x DDT) – RT – FT – FF – PF
The updated formula takes a reading of the preferment temperature, which is then considered to find the DDT. The final dough temperature is multiplied by 4, and the preferment temperature and the other known readings are deducted.
You could also use this method for other major additions to the dough if you really wanted to. Still, I can’t think of an example where this would be necessary -there’s a limit to the level of accuracy controlling dough temperatures can reach!
Using base temperature to calculate DDT
The perfect dough temperature can also be set individually for the type of bread being produced. This method uses the Base Temperature (BT) method.
Professional bakers often use a Base Temperature recommendation in their bread recipes.
It combines the Desired Dough Temperature and the Friction Factor to become one value, meaning a simpler calculation is followed. Note this is a professional method, so a professional dough mixer is expected to be used!
(FT + RT) – BT = WT
Base Temperature is usually between 50-80C (120-175F). If no base temperature is provided, you can use 55C (130F) to follow this method.
Why is dough temperature a problem?
Temperature is essential for yeast activity and fermentation. If the temperature is not controlled during mixing, the bread looks, behaves, and tastes differently.
Here are the key impacts of not taking temperature management seriously:
Timing
If the dough is too cold, yeast fermentation or sourdough starter activity slows right down. The cold dough needs more time to produce enough gas to rise. Overly long proofing is not only infuriating but can also cause issues with gluten deterioration (uneven crumb structure and poor rise) or oven bottle-necking in industrial situations.
Poor gluten development
It’s common when hand kneading to end the kneading stage prematurely when the dough becomes warm. Not kneading for long enough leads to less gluten development, and to get a nice, light and airy crumb, it is important to knead the dough to maximum potential. An under-kneaded dough will be dense and like a brick.
Over-oxidation
Oxidation is the action of oxygen being absorbed by the flour. In small amounts, oxidation is necessary to provide gluten strength and aid yeast respiration. Too much oxidation (flour bleaching) deteriorates the bread’s taste and aroma. Mixing dough above 28C (82F) increases oxygen absorption and, therefore, the risk of over-oxidating.
Flavour
When dough is risen for longer (or better still, double risen), organic products multiply, leading to a fuller flavour and better-keeping qualities. Warm dough rises faster than cool dough. So for more flavour, you don’t want your dough to be too hot (yeast activity is too fast) or too cool (yeast activity is almost non-existent).
Crumb structure
If the dough is too warm, the proofing duration is reduced. This decreases the development of the gluten structure and the generation of organic acids. A lack of dough maturity reduces gas retention properties, diminishing the dough’s rise (and oven spring). Bread that hasn’t risen well will have a dense crumb.
Dough collapses
Rising too fast can cause the gluten strands to degrade. Lactic acid bacteria and protease enzymes multiply and destroy the gluten strands. Initially, a drop in gluten extensibility is noted, with a complete loss of structure noted in time.
How to control dough temperature without a formula
Many craft bakers don’t use a dough temperature formula. Instead, they take a temperature reading after kneading the first mix of the day. If it reads high, the water temperature is dropped for subsequent doughs. If it’s cool, warmer water is used.
FDT measurements are taken throughout the day, and water temperature is constantly adjusted. When baking in the same environment each day, bakers soon learn to approximate their water temperature with relative accuracy.
How to control dough temperature when hand kneading
The friction factor is higher when hand kneading, so a warmer dough is common. Use a dough kneading technique that reduces contact from your hands to reduce heat transfer.
I recommend the autolyse technique when kneading by hand. It reduces mixing time by allowing the flour to develop naturally. It saves your arms too!
Alternatively, place the dough in the fridge for 5 minutes halfway through kneading to cool the dough. After the rest, it’s much easier for your dough to pass the windowpane test.
Changing DDT to suit the proofing environment
The bread proofing temperature is the temperature of the environment that dough proofs or ferments. A professional baker has a temperature-controlled proofer set to the ideal heat.
If the bread proofing temperature is excessively warm or cold, you can decrease or increase the dough temperature to compensate!
Alternatively, you may wish to get a home proofer of your own!
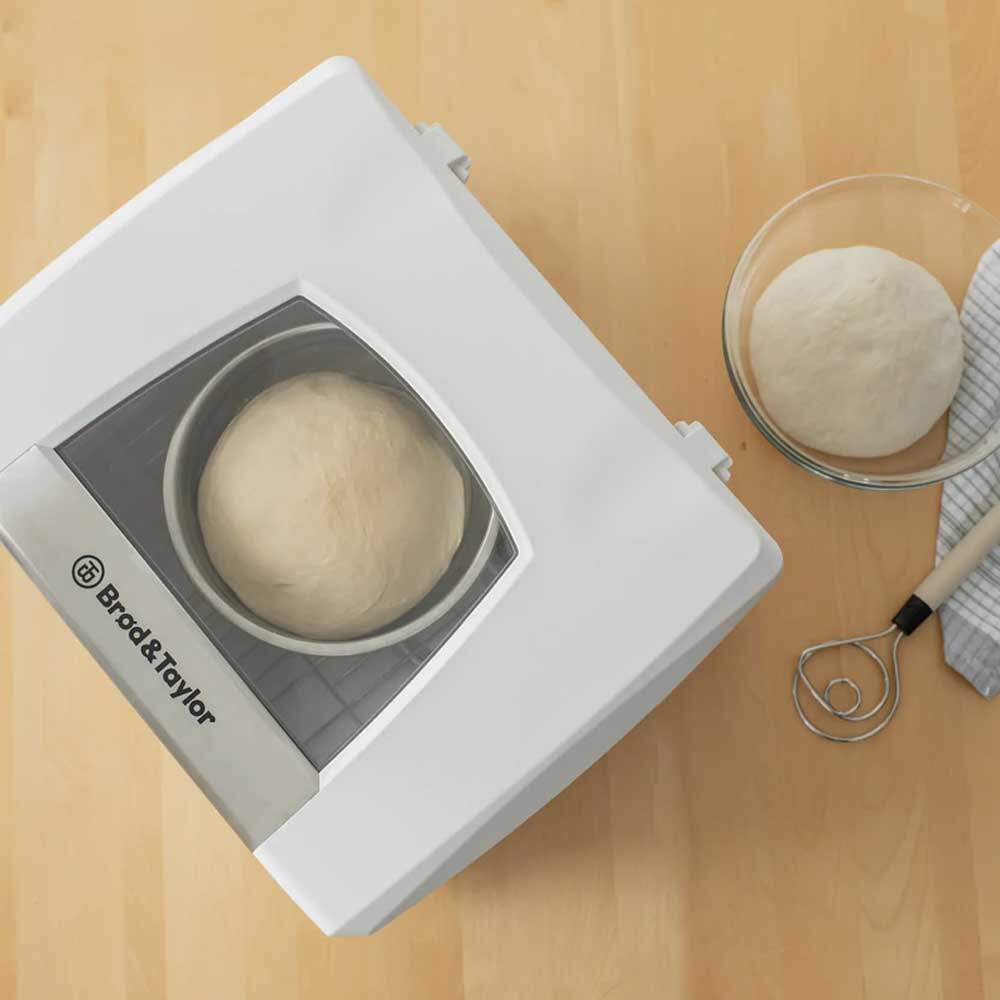
The Brod & Taylor home proofer works like the proofers I use in my bakery at work. With the ability to set the temperature of your proofing environment and add humidity. you’re able to create the perfect place for your dough to rise.
Check it out at the Brod & Taylor website or visit Amazon.
Formula to calculate water temperature in Fahrenheit
This method also works in Fahrenheit, but instead of 18, take away 30:
3 x DDT – RT – FT – 30 = WT
Example: RT = 80 FT = 75 DDT = 75 225 - 80 - 75 - 30 = 40F
Ending thoughts on desired dough temperature
We’ve covered how to take temperature readings and use a formula to obtain the optimum dough temperature after kneading. We’ve also discovered why temperature control is important when working with dough. What did you enjoy the most? Let me know how these methods work for you or if you have outstanding questions in the comments below.
Frequently Asked Questions about desired dough temperature
If you’ve enjoyed this article and wish to treat me to a coffee, you can by following the link below – Thanks x


Hi, I’m Gareth Busby, a baking coach, head baker and bread-baking fanatic! My aim is to use science, techniques and 15 years of baking experience to help you become a better baker.
Table of Contents
- What is Desired Dough Temperature (DDT)?
- Desired Dough Temperature vs Final Dough Temperature – what’s the difference?
- What is the ideal Desired Dough Temperature?
- How to achieve perfect dough temperature
- Why is my dough temperature different to the target?
- The Friction Factor
- What is a normal friction factor?
- The 240-factor method
- How to get the perfect FDT when using sourdough or preferment?
- Using base temperature to calculate DDT
- Why is dough temperature a problem?
- How to control dough temperature without a formula
- How to control dough temperature when hand kneading
- Changing DDT to suit the proofing environment
- Formula to calculate water temperature in Fahrenheit
- Ending thoughts on desired dough temperature
- Frequently Asked Questions about desired dough temperature


