

The baking temperature affects many aspects of bread. Taste, texture, smell, keeping quality and appearance characteristics are all affected by the chosen temperature of the oven.
In most cases, it’s best to stick to the baking temperature recommendations of a recipe. But, if you think better bread can be achieved by adjusting the temperature of the oven, in many cases, it can!
This write-up not only covers the best temperature to bake bread, but you’ll also understand what happens when bread bakes, why particular baking temperatures are selected and advanced oven baking techniques.
For standard bread, the best baking temperature is 220-230C (435-450F). Midway through, the heat can be turned down to 200-210C (390-410F) to dry the core of the loaf without risk of burning. Bread containing sugars or fat requires a cooler baking temperature. Otherwise, it will burn.
What happens when bread bakes?
As soon as bread goes into the oven, the first thing that happens is moisture in the dough evaporates into water vapour. Yeast cells rapidly feast on the available sugars, creating gas at a rapid rate as they become hotter. These two actions combine to make the dough rise rapidly in the oven, called “oven spring”.
Once yeast reaches 64C (148F), the active fungus dies. This deactivation of the yeast cells happens around 15 minutes into baking and is called the “yeast kill point”.
Around the same moment of yeast kill, the crust will have dried out and become rigid, preventing the dough from rising. We call this the “crust set point”.
Enzymic reactions (Malliard) and caramelisation occur on the crust, providing colour, flavour and deep aromas.
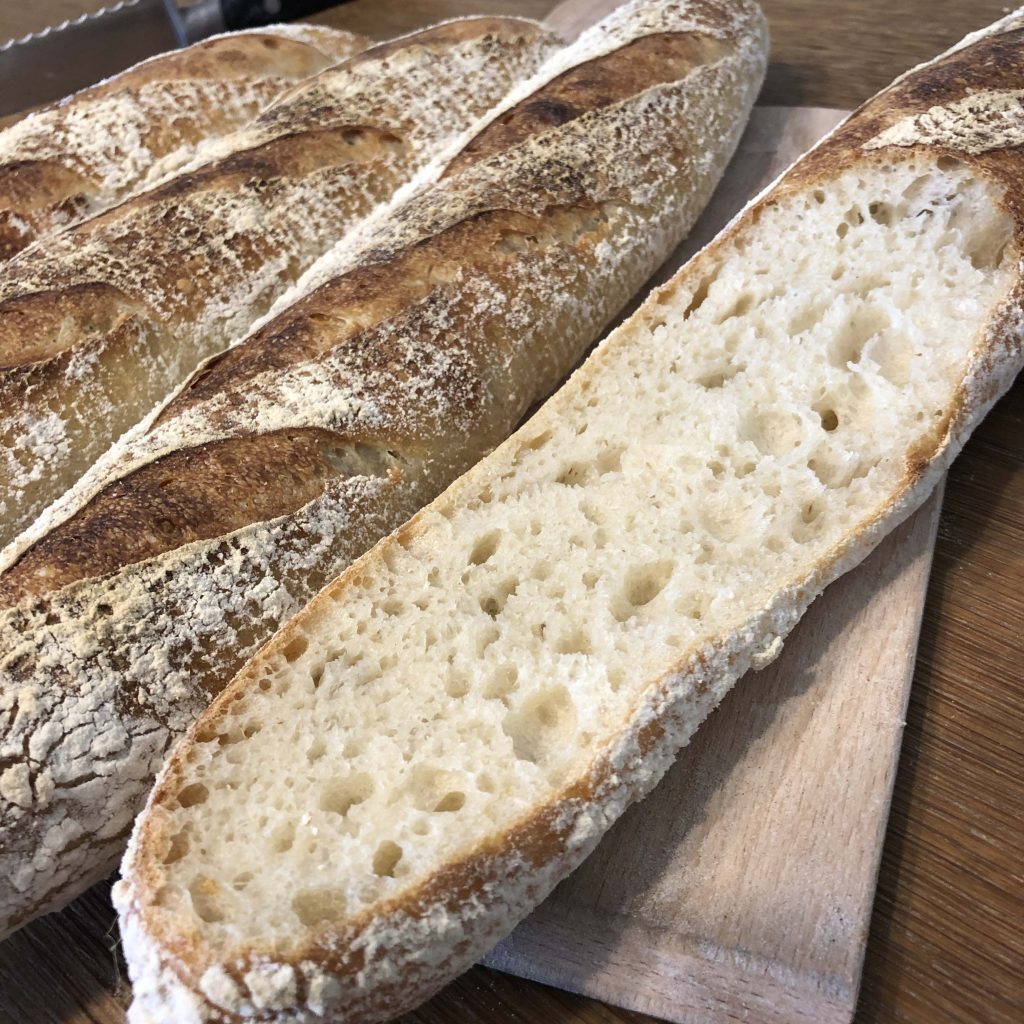
For the remainder of the bake, moisture is lost from the gluten proteins, which form the aerated structure of the crumb and capture starch particles. As baking continues, moisture escapes the bread’s core to dry the crumb, and the crust hardens.
What impacts the choice of baking temperature
When it comes to deciding on the perfect baking temperature for your bread, 5 things need to be considered in line with the baking temperature:
- Baking duration
- Power of the oven
- Humidity/use of steam in the oven
- Number of sugars in the recipe
- Inclusion of fat in the recipe
Each of the above points impacts the other, so there is no perfect baking temperature for every type of bread. Here are some combinations for the most common types of bread:
| Bread | Steam | Time | Temperature in Celsius | Temperature in Fahrenheit |
|---|---|---|---|---|
| Sourdough | Yes | 35 minutes | 220C | 430F |
| Tin loaf | Yes | 33 minutes | 230C | 445F |
| Soft farmhouse tin loaf | Little | 35 minutes | 210C | 410F |
| Crusty Bloomer | Yes | 35 minutes | 220C | 430F |
| Baguette | Yes | 25 minutes | 230C | 445F |
| Soft loaf | No | 30 minutes | 210C | 410F |
| Croissants | Little | 23 minutes | 200C | 390F |
| Brioche | No | 25 minutes | 180C | 360F |
| Soft rolls | No | 12 minutes | 230C | 445F |
| Crusty rolls | Yes | 22 minutes | 220C | 430F |
Now, let’s look at the five points mentioned above that contribute to deciding the baking temperature:
Using steam in the oven
Baking bread in a humid environment delays the setting of the crust, which promotes oven spring gains. It also extends the baking time, resulting in a drier crumb and a perfectly crispy crust.
Without adding steam, the bread is ready in half the time. This is useful for soft loaves or rolls where the extra moisture retained in the crumb is appealing but not crusty bread.
There are many ways to create humidity in an oven. The easiest solution is to use a water mister to spray inside as the bread goes in to bake. You can see other methods in my adding steam to an oven guide.
Power of the oven
The speed your oven regains temperature after your bread is loaded is a contributing factor to the baking temperature. Once loading your oven, it can drop by as much as 60C! How quickly your oven can return to temperature and taking steps to reduce temperature loss, make a massive difference to bread quality.
Commercial bakery ovens use 3-phase power to reduce the recovery time of the oven, at home you can preheat baking stones, lava rocks and baking trays to retain heat and reduce recovery time if your oven lacks power.
What many bakers do (including professionals) is preheat the oven 10-20 degrees higher than the ideal baking temperature. Once the bread is loaded, the thermostat is lowered to compensate for the expected drop in temperature.
The baking time
A longer baking duration is handy if your dough is particularly wet or large and requires time for the extra water to evaporate. Larger loaves or “miches” require longer baking times to bake the centre, which requires the baking temperature to be reduced to prevent the crust from burning.

Shorter baking times usually require a hotter baking temperature to colour and set the crust – whilst retaining moisture in the crumb for a soft, moist eating experience.
Neoploititean pizza is a great example where bread is baked in a very hot (420C at least) wood-fired oven for around 1 minute. The pizza’s outer crust and base colours impart smoky aromas throughout. Whilst the outer areas of the crust remain soft, the inner section of the crust is moist.
The number of sugars in the recipe
Sugar caramelises in the oven. This produces a darker crust which, in many cases, should be avoided. The baking temperature should be lowered when baking bread that contains lots of sugar or sweeteners, such as brioche or pain de mie.
You may have noticed that long-fermented bread doughs have a darker, more mature colour compared to quickly-made supermarket loaves, which are more orange in colour. This is largely because the long fermentation facilitates more starch to be broken down into naturally occurring sugars which caramelise during baking.
Note: Extra sugars found in sweet dough feed the yeast, so it rises rapidly during oven spring.
The inclusion of fat in the recipe
Fats lowers the burning point of the bread, making it brown quickly in the oven. When baking with fat, it’s wise to reduce the baking time and/or drop the baking temperature.
Eggs are fatty items that are also high in protein which lead to further Maillard reactions and extra colour.
How Maillard reactions create colourful bread
Maillard reactions are chemical processes that occur when an amino acid and a reducing sugar are heated together. The sugar’s reactive carbonyl group interacts with the amino acid’s nucleophilic amino group to create new molecules with intriguing yet poorly described odour and flavour compounds.
The net result is more complex flavours, and new aroma molecules appear which are not unrelated to the raw ingredients, including raw flour.
Maillard reactions explain why roasted coffee and peanuts taste so different from their raw form!
The Maillard reaction also produces enzymatic browning, which makes food turn brown or black. This reaction and caramelisation should not be confused.
Caramelisation occurs when heating sugar to the point that it burns.
Caramelisation and the Maillard reactions are used in conjunction with one another to change the properties of bread. The variables that contribute to the amount of caramelisation and the Maillard reactions include:
- The temperature of the oven
- Number of available sugars
- Type of amino acids (protein) available
- PH value of the dough
Tips for baking the perfect loaf
1) Decide on your baking process
Using the guide above, decide which baking method you’ll follow. It’s best to have a clear plan before your bread goes into the oven so you know what texture you are aiming for.
2) Check on your bread (at the right time)
Don’t open the oven door when baking bread in the first 15 minutes unless your baking time requires. At this point, the dough is very delicate, and the humid and high pressure of the baking chamber is supporting its structure. Opening the oven door during this time can lead to your bread collapsing.
After this point, check on your baking bread every 5 minutes to check that the bread isn’t browning too quickly (temperature too high) or remaining pale (temperature too low).
3) Learn your oven
The temperatures provided are guides. They may change from oven to oven as some operate more fiercely than others. Some will have their heating elements at different distances from the baking bread.
4) Drop the temperature mid-bake
Gains occurring during oven spring are more notable in warmer ovens. Therefore, many professional bread bakers set their ovens 10-20 degrees higher for the first 15 minutes and then reduce the temperature alongside opening the damper or temporarily opening the door to release steam midway through the bake. The loaf will brown slowly whilst moisture exits the crumb.
5) Check your oven is at the correct temperature
It’s a shock to bakers when they discover their ovens are running 10-20 degrees out from the temperature on the dial.

To be sure that you are baking at the correct temperature, get yourself an oven thermometer. These thermometers will sit in your oven to provide an accurate temperature reading.
6) Use a baking stone
A baking stone improves the conduction of heat into a baking loaf. Heating bread from below pushes water vapour upwards, which improves oven spring and ensures the bread’s base is crisp and properly baked.
If you don’t have a baking stone, a thick baking sheet can be used to bake on. See the baking stone that I recommend.
Additional items can be used to retain heat in your oven. See how to bake bread without a Dutch oven to see what I do.
7) Properly preheat your oven
When the light near your oven’s dial goes out, the baking stone won’t be hot through yet. It can take up to an hour (depending on the thickness of the stone) to properly preheat a baking stone.
Not preheating fully makes it less effective at conducting heat into the bread, which will reduce the oven spring rise. I recommend using an infrared thermometer to check the temperature of the stone.
8) Cool your bread
Once your bread is baked, it really needs to cool before you slice it. Cooling time allows moisture to escape, dries the crumb and hardens the crust. Aim to cool your bread until it reaches 35C, which will take 2-3 hours.
Top tips for changing the oven temperatures at home – Conclusion
To practice these tips, follow a bread recipe for your first bake, then use the oven temperature dial to “fine-tune” for subsequent attempts. After experimenting with different temperatures, you’ll soon find out how to get your bread to come out just right!
Let me know what you learned about bread baking temperature and how you will approach bread baking differently in the future by leaving me a comment below.
Best bread baking temperature frequently asked questions
Here are the baking temperatures for some of the most popular homemade types of bread:
If you’ve enjoyed this article and wish to treat me to a coffee, you can by following the link below – Thanks x


Hi, I’m Gareth Busby, a baking coach, senior baker and bread-baking fanatic! My aim is to use science, techniques and 15 years of baking experience to make you a better baker.


