

Artisan bread is what makes my heart rate race, my taste buds salivate and constantly fulfils my natural curiosity of experiencing new things. Being an Artisan isn’t just about a recipe, it’s a way of life. From the selection of the ingredients to the way a product is crafted and how it is sold. An Artisan creates a product that extracts the true quality of the ingredients it contains.
There are many different industries other than bread that feature artisan producers. Cheese, meat, jams and pickles, chocolate, pizza. But being an artisan doesn’t stop with food! It can be used to describe plasterers, mechanics, craft shops, jewellers and even hairdressers.
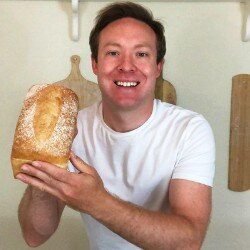
")
What is special about artisan bread?
Where a lot of business owners from the mentioned industries call themselves artisan. It’s not really deserving. Wow, I don’t mean they are no good! Just that they will use the same techniques that non artisans use to create their jam or cut their hair. They describe themselves as an artisan to guarantee their quality.
So artisan bread is a lie?
Artisan bread is different to the modern-day bread we are accustomed to buying in supermarkets. The techniques used, the ingredients selected and the time it takes to make artisan bread are very detached from common bread making. That said someone who bakes bread at home will be using traditional artisan techniques so for a home baker learning to bake artisan bread is the same as another bread making (it’s just assurance that the teacher has experience in baking bread that sells).
Artisan bread baking is about extracting the best product possible from the ingredients by allowing the dough the time to develop flavour and structure. Modern bread making is more to do with adding ingredients to the mix to speed the process up. This takes away much of the flavour and the result is a product that’s “ok, but not great”.
How an artisan baker works is different to a standard baker
An artisan baker knows the story of the flour. Qualities such as the location it’s grown, the protein level, the gluten developing qualities such as elasticity and extensibility. A standard baker will tend to use just three types of flour, white, wholemeal and malted. And that’s it.
Non-artisan bakers will create different recipes for bread by adding pre mixes to their mix. Artisans will vary the flour type, add extra ingredients or change the fermentation method.
Artisan bread making techniques
Slow fermentation creates a strong gluten structure in the dough. Structure gives the bread its bounce, crusts and a moorish rip when pulled apart (I find it moorish, but it could just be me). Just as important as structure is, long fermentation allows the dough to develop deep and rich flavour characteristics. By increasing or decreasing the mixing time the dough takes on different characteristics, as does altering resting times, temperature or the recipe. The quality of the bread and how consistent the end result hits the mark are true reflections of the baker’s ability. These skills take years of training to achieve.
Artisan bakers use the best quality ingredients available in a constant search to create the perfect loaf. What they will never use are pre-mixes or bread improvers. The use of these are forbidden in the artisan world. Artisan bread is expected to be crafted by using slow fermentation techniques, largely if not solely without machine and have low amounts of yeast. Following the philosophy of an artisan leads the baker to create amazing quality bread.
The selection of quality ingredients
Where industrial food producers love consistency and add ingredients (often artificial) to provide this, artisans embrace trying new raw materials to create alternative products. Artisan producers lap up the ripest fruit, grain or breed of animal in order to create a new product that displays their enthusiasm for their skill.
This is true for artisan bread bakers who embrace new flours or baking techniques to create different characteristics in their bread. It’s not necessary for an artisan baker to use local ingredients but it’s often what is fresh and high quality plus in demand from curious locals.
Some artisan bakers will try different flours for new tastes and aromas. Others create a unique bread from a special flour, often locally milled.
Again being an artisan is about the quality of the ingredients, production method and the end product foremost. It’s not necessarily the location of the ingredients, but a bit of a story about why they are selected to create the best possible product is necessary in today’s artisan world.
The equipment required for artisan bread
Artisan bread is usually made with minimum equipment. Quality artisan loaves can be made with just a table and an oven with a baking stone. Other equipment can speed up the process, but a skilled baker with an oven is all the machinery it needs to be able to create world-class bread.
Equipment such as mixing bowls, dough dividing presses or conveyor oven peels can be used to make the baking experience faster, easier and more consistent. But they are timesavers, and far from necessary.
Artisan baker equipment
Many artisan bakers choose to use the minimum available equipment. They prefer baking in small batches and keeping in contact with the dough throughout the baking stages. It’s not true that all artisans prefer this, some love a gadget that saves them time and improves consistency. It’s a hard slog being a professional baker, if you can save some time and energy to focus on your strengths then who can blame you? Here are a few pieces of equipment that are often used in an artisan bakery:
Lame– used the cut the dough before baking in the oven
Couche– to support the dough during proofing so the dough retains its shape. Important for baguettes and ciabatta type bread.
Banneton– these are bread proofing baskets used for artisan bread final proof.
Scales– bakers always weigh their ingredients, never is a recipe created by using volume measures.
Bread tins– such as specialist brioche and sandwich bread tins used to prove bread dough.
Bakers peel- used to remove bread from the oven.
Dough scraper– both plastic (for mixing) and metal (for dividing) dough scrapers are used in artisan baking.
View the entire range of baking equipment I recommend.
How long does it take to make artisan bread
For maximum flavour and texture, slow fermentation is preferred. Typical artisan bread fermentation time is around 4 to 6 hours but can be much longer if pre-ferments or fridge retardation is used.
Is artisan bread better for us to eat?
It tastes better, much better, so it must be good? I’ve found that unless you have a diet that consists of a lot of processed food it’s unlikely that the quality of artisan bread will be overlooked. Due to the slow fermentation and lack of artificial ingredients artisan bread is easier to digest so much better for our bodies. Especially noticeable by those with allergies. I’ve spoken to many people who tell me they can only eat artisan bread, modern bread makes them ill.
How to learn to bake artisan bread
If you want to learn how to make bread the artisan way, the primary thing you need to learn is how to develop dough till it’s ready to be proofed and finally baked. Initially there’s no need to learn how to use equipment or special techniques, a good hand kneading technique should be your primary focus. Here’s my guide on how to knead dough.
Artisan bread recipe
Once you’ve learnt how to knead the dough the rest will come with practice. Here’s a “real” artisan bread recipe for a brown country cob to get you started:
Ingredients
480g Wholemeal bread flour
130g White bread flour
40g Dark rye flour
460g Water
10g Fresh yeast
13g Salt
6.5g Vegetable oil
Method
Step 1
Weigh the water, add the yeast and the oil to the same bowl
Step 2
Weigh all remaining ingredients into a separate bowl
Step 3
Add all wet to the dry bowl and mix with either a plastic scraper or using the pincer technique
Step 4
After about 2-3 minutes the flour will be almost fully absorbed into the mix so turn out on a table
Step 5
Gently knead the ingredients together, trying to stretch the gluten as much as possible for a further 8 minutes
Step 6
Put the dough back in the bowl, cover and place in the fridge for 10 minutes
Step 7
Take the dough out and place it back on the table and knead for 8 minutes:
Step 8
Oil a bowl lightly and place the dough in it, cover and leave overnight (12-16 hours)
Step 9
Take the dough out to rest for 1 hour
Step 10
Pre-shape the dough into a round:
Step 11
Leave to rest for 10 minutes before repeating the moulding, this time make 6 cuts with a sharp knife or lame around the edge before placing on a board or baking sheet.
Step 12
Leave to prove for 2 hours. Turn the oven on at 240C (460F) (preferably with a baking stone in it) with an hour remaining with a baking sheet on the bottom shelf to heat up.
Step 13
Place the dough into the oven either by placing the baking sheet directly in or by using a peel (or fish slice) to drop the dough directly on the stone if using. Add a cup of water to the oven. Shut the door quickly and turn the heat to 220C (430F).
Step 14
After 25 minutes, turn the heat down to 200C (390F) for another 10-15 minutes, if the bread is too dark turn the heat down a little more. It may be a good idea to rotate the bread in the oven if you find it’s overdone on one side.
Step 15
Remove from the oven, with a peel or by taking the tray out. The base should sound hollow when tapped. Leave for 1 ½ hours to cool your bread before slicing (if you can!).
If you’ve enjoyed this article and wish to treat me to a coffee, you can by following the link below – Thanks x


Hi, I’m Gareth Busby, a baking coach, senior baker and bread-baking fanatic! My aim is to use science, techniques and 15 years of baking experience to make you a better baker.
Table of Contents
- What is special about artisan bread?
- How an artisan baker works is different to a standard baker
- Artisan bread making techniques
- The selection of quality ingredients
- The equipment required for artisan bread
- Artisan baker equipment
- How long does it take to make artisan bread
- Is artisan bread better for us to eat?
- How to learn to bake artisan bread
- Artisan bread recipe


