
Why Is My Bread Collapsing Or Shrinking After Baking?

As a bread baker, you want to make sure that all your hard work is worth it. If you’re not aware of all the pitfalls, bread can easily collapse or shrink after it’s baked. These defects can be a negligible slight dimple to a giant crater! Either way, if there’s a way to avoid it, you’ll want to know how to prevent your bread collapsing or shrinking! So why does this happen? Well, first, let’s look at the overlying reasons for bread to collapse:
Bread collapses after baking due to moisture remaining in the crumb. As bread cools, moisture escapes causing the bread to shrink. As it is released from the crumb, water latches onto the crust, making it heavier. The crust is pulled down by gravity, and if the crumb structure isn’t strong, the crumb contracts. This leads to the crust collapsing or wrinkle lines appearing on the surface.
There are several reasons this could happen. The cause could be down to one single issue, but most likely, it’ll be a combination of small faults. Fixing collapsing bread may take a handful of test batches. Expect to be patient and keep tweaking, even if you don’t succeed at first!
Causes of bread collapsing after baking
There are seven things you should consider when fixing bread that is collapsing after baking. Cooling and shaping are important for any type of bread. But, depending on the bread being made, there are two main avenues to focus on.
For quickly made bread, a low-hydrated dough, plenty of kneading, and high-protein flour are important.
For longer-proofed artisan bread, give the dough plenty of time to ferment and master the baking temperature and duration.
Let’s look at these solutions in more detail. We’ll cover the reason for wrinkles in the crust afterwards, as they are semi-related.
#1 Reduce the water in the recipe
A strong gluten network is reliant on well-hydrated flour. If the dough has too much moisture, it can cause the crumb to contract as it cools. Quickly made loaves generally prefer dryer doughs to avoid shrinkage. If your dough is too wet, lower the amount of water in the recipe next time. Baking for a little longer can also help solve the problem.
#2 Bake for longer
To make a dough structure less moist in an open crumb structure, instead of lowering the hydration of the dough, bake it for longer. Use my guide on the ideal oven temperature for bread to see the perfect solution. A loaf with a crisp, set crust is more resistant to caving in as it cools.
#3 Extend the fermentation time
An artisan loaf needs plenty of time for water to soak the gluten. Awarding the dough more time to rest or adding an autolyse step allows the gluten to relax and re-bond (into a robust structure), which reduces the time required to knead the dough to reach 100% gluten development. There will also be benefits from the increased amounts of organic acids and ethanol found in extended fermentation. This will strengthen the gluten and make the bread less resistant to collapse.
#4 Reduce the yeast/ more kneading
Bread can collapse if there is too much gas in a dough that is not mature enough. A weak gluten structure can create big irregular pockets of air through the crumb, sometimes called tunnelling. These are often found near the crust area, which can cause the crust to sink as it cools. Reduce the amount of yeast used and increase the rise time, or knead for longer to fix the problem.
#5 Switch the flour
A weak crust causes bread to collapse. A common dilemma if commercially baking is when a new batch of flour arrives. The new flour makes the dough behave differently and can lead to more shrinkage or the bread collapsing. The type of flour used is also a key contributor to the chewiness of a loaf.
A strong crust comes from a well-developed dough. To achieve this, flour with high-protein bread flour and kneading your dough well are essential.
Lowering the water in the recipe can prevent recurrences, as can adding vital gluten powder.
#6 Work on your shaping
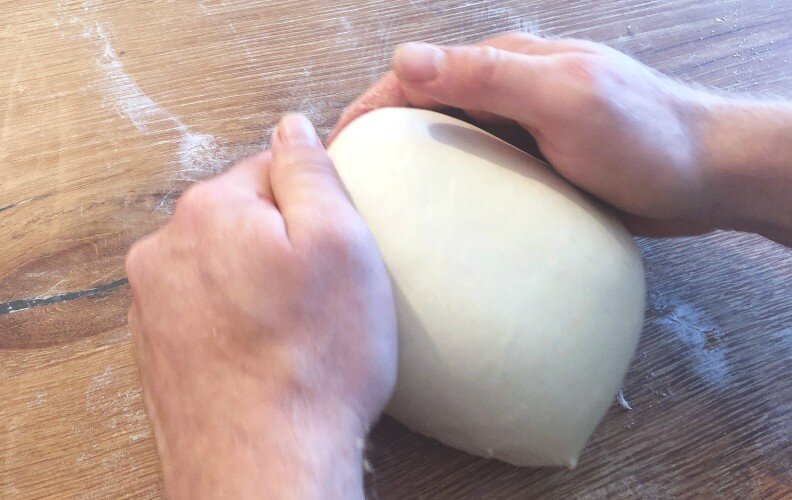
To control the rise of bread, shaping has a major impact. Stretching the outer membrane to create tension will help a lot. This provides support for the dough as it rises. Poor shaping is especially prevalent in bread machines. Here, the bread often collapses as the dough is not shaped. To find out more about shaping, see my shaping and preshaping guide.
#7 The importance of cooling
As the bread cools, it needs to expel moisture from the crumb. It’s an important step in baking that is often not taken as seriously as it should. Moisture clings onto the starch particles on the outside edges of the crust as it exits the core of the cooling bread. This allows the starch to harden and burst, which contributes to making the crust crispy.
If the bread can’t escape from the edges because, say, the bread remains in the tin after baking or cooling loaves are lined up next to each other, we will have a problem!
As moisture can’t escape from the sides, it tries to force itself up through the weakest points on the top of the bread. This creates irregular patches of moisture which can lead to random craters on the surface of the bread or the loaf collapsing.
Further reading: How long to cool bread
Why does my bread wrinkle on the surface?
It’s common to see bread, particularly soft rolls wrinkling once cool. All bread shrinks as it cools, but it’s more noticeable in soft types of bread. Soft bread contains more moisture, so as it cools, the crust absorbs lots of water. This weighs down the crust which collapses as the bread shrinks to create wrinkles. Wrinkles are not easy to prevent.
To make soft and fluffy bread, we use high amounts of yeast alongside fast mixing. These accelerate the proofing time and retain moisture in the crumb. They are baked quickly, again to keep a moist crumb. The wrinkling issue occurs after baking when the rigid gluten structure allows moisture to escape upwards. The crust absorbs some of the escaping water, and as its weight increases, it contracts. This pulls the crust down and reveals wrinkles on the surface.
How to stop my soft rolls from wrinkling after baking?
The best solution to prevent wrinkle lines on your bread is to give the tray a hard bang on the table as they leave the oven. This sets the crumb and prevents wrinkles from appearing. You can also try using high-protein flour or baking for a longer time.
Should I cover the bread with a towel?
Covering the bread with a tea towel or similar during cooling is a popular way of softening bread. It works well for this purpose, but if you are finding wrinkles on the surface, you might prefer to let the bread cool for a bit before adding the tea towel.
Other causes of wrinkles include high humidity, high proofing temperature, too much fat, too much sugar or over-proofing.
Why do my cinnamon rolls shrink after baking?
The most common reason for shrinkage is that the dough was chilled before shaping. This will cause the butter to be too cold and stiff, which can lead to a denser dough that doesn’t rise as well. Ensure your buns are at room temperature when you shape them so they don’t get too dense or tight.
Another possible culprit is over-kneading the dough. This could produce an elastic dough that’s more suitable for bread. Firm doughs contract more as they cool, so that you will end up with shrinking buns. Try and aim for a light and fluffy cake batter texture when you make cinnamon buns.
No-knead bread collapses after baking?
This is likely due to a lack of gluten development, as the dough was not kneaded. To prevent this from occurring, place the dough in the fridge overnight. This will allow the gluten to develop in a compact network that doesn’t collapse after baking.
Why does baked bread sink in the middle?
If there is too much moisture in the bread after baking, or the bread is underbaked in the centre, it may collapse as it cools. Bake for longer, lowering the temperature of the oven if the crust browns before the middle is cooked through.
If you’ve enjoyed this article and wish to treat me to a coffee, you can by following the link below – Thanks x


Hi, I’m Gareth Busby, a baking coach, senior baker and bread-baking fanatic! My aim is to use science, techniques and 15 years of baking experience to make you a better baker.
Table of Contents
- Causes of bread collapsing after baking
- #1 Reduce the water in the recipe
- #2 Bake for longer
- #3 Extend the fermentation time
- #4 Reduce the yeast/ more kneading
- #5 Switch the flour
- #6 Work on your shaping
- #7 The importance of cooling
- Why does my bread wrinkle on the surface?
- How to stop my soft rolls from wrinkling after baking?
- Should I cover the bread with a towel?
- Why do my cinnamon rolls shrink after baking?
- No-knead bread collapses after baking?
- Why does baked bread sink in the middle?


